
Host your site with Webflow and take advantage of two CDNs: AWS's Cloudfront and Fastly! Set up is painless and only takes a couple steps.
NOTE: You can now purchase a domain directly on Webflow via Google Domains (US billing addresses only).
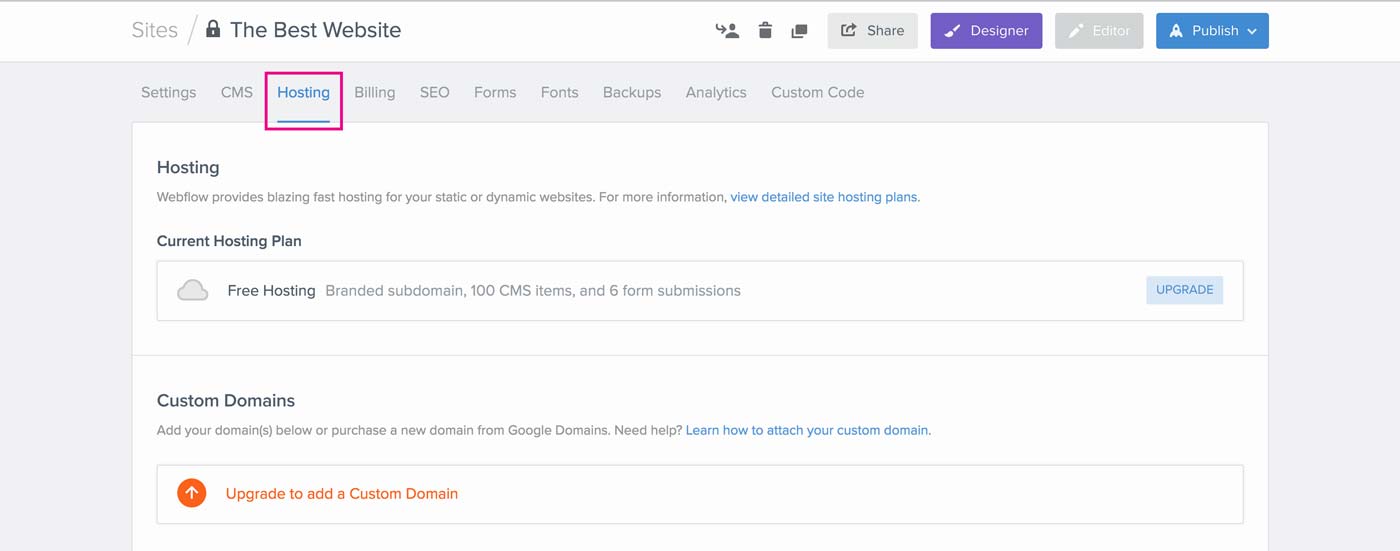
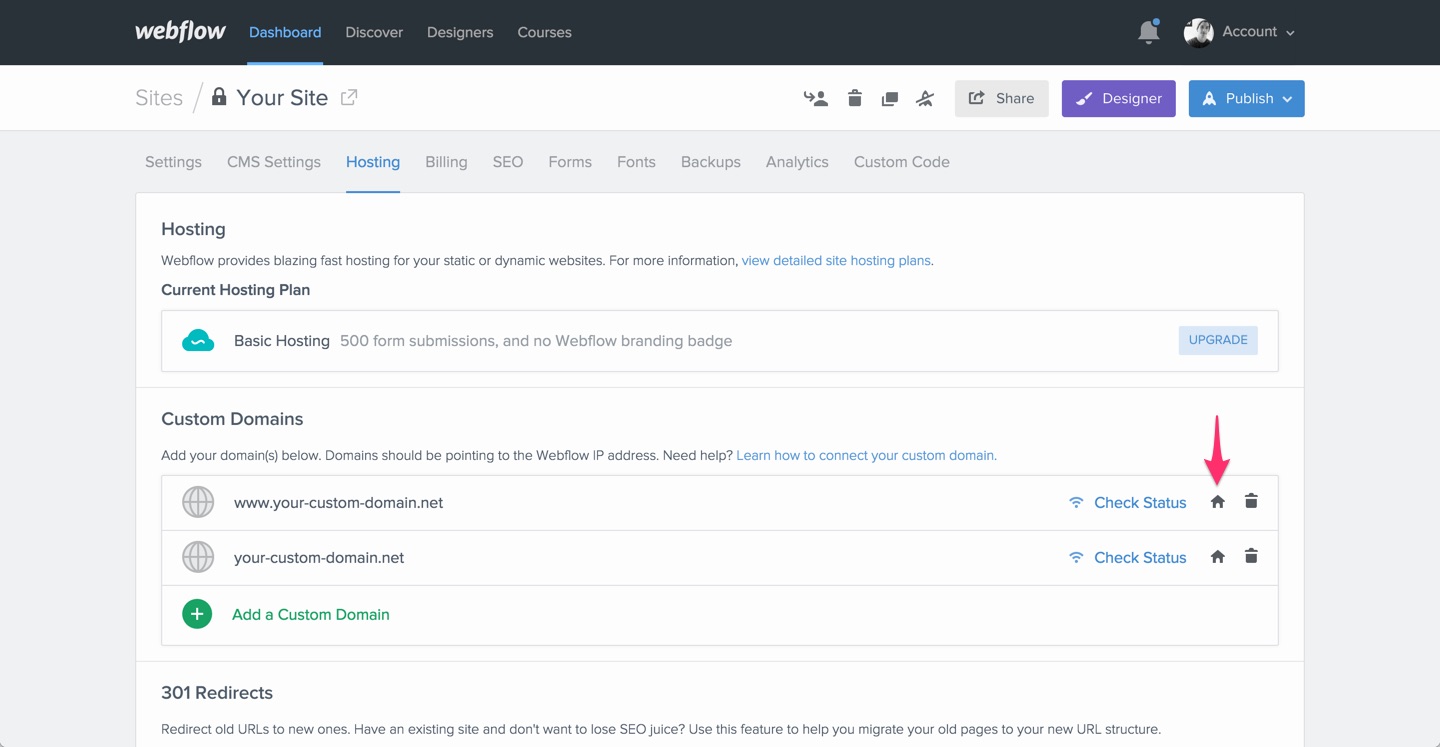
Step 1: Go to the Hosting tab in your Site Settings
The Hosting tab is located within your website settings. This is where you'll manage your hosting plan, as well as your custom domains for this site.
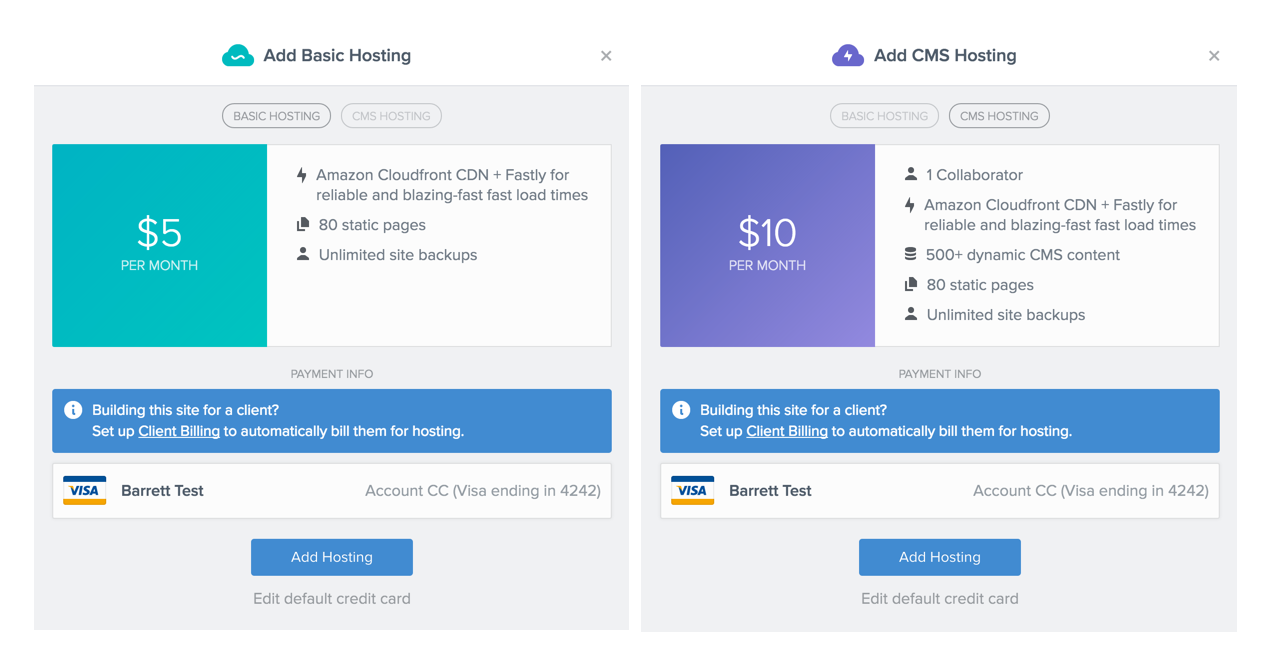
Step 2a: Upgrade your website's hosting description (if you haven't already)
In order for you to add a custom domain, you must first upgrade to either a Basic Hosting subscription, or a CMS Hosting subscription. Each plan will offer slightly different features and benefits, but both will allow you to add or register a custom domain (with Google Domains).
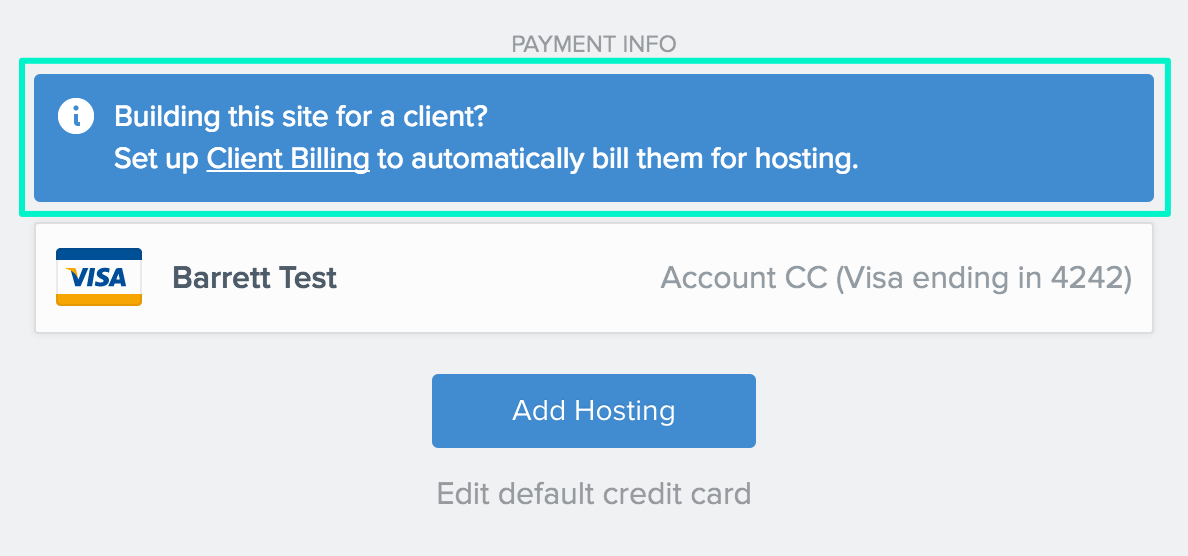
Step 2b: Set up Client Billing
Building the site for someone else? Set up Client Billing to bill someone else for hosting fees, and tack on a margin to make a recurring profit each month.
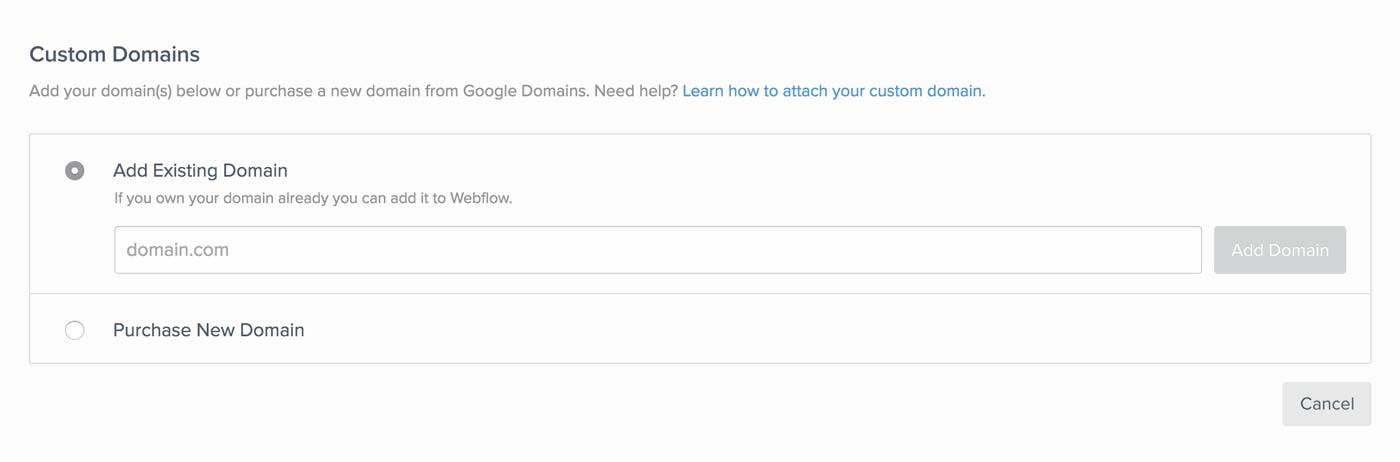
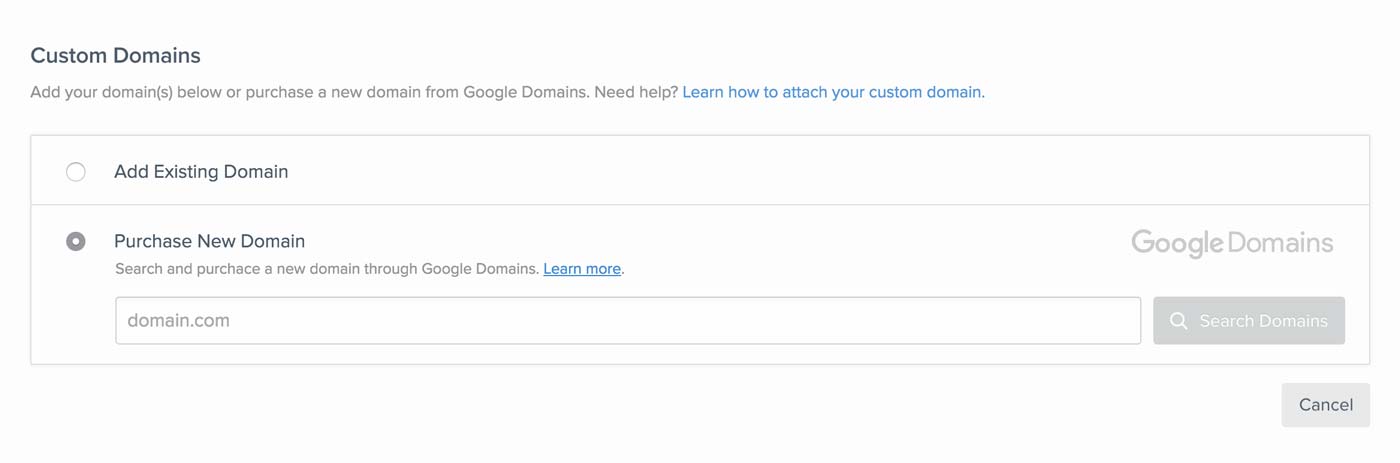
Step 3a: Add a custom domain
There are two ways in which you can add a custom domain in Webflow. You can either add a custom domain in which you've already purchased at a different registrar or purchase a new domain using Google Domains and Webflow. This step demonstrates how to add a custom domain you already own. If you wish to purchase a new domain, skip to Step 3b.
1. Add an existing custom domain from a separate registrar
If you've already purchased a domain that you wish to use on your Webflow site, you will simply follow the steps below.
2. Update DNS Settings:
Root Domains
Add both A Records below
Host Name: @
IP Addresses: 23.235.33.229
Record Type: A (Address)
TTL: 300
Host Name: @
IP Address: 104.156.81.229
Record Type: A (Address)
TTL: 300
NOTE: The reason for adding two A-Records is for load balancing and redundancy in case anything happened to the primary server. This gives your domain an even higher chance of showing up.
Subdomains (e.g. with "www.", or other domain names)
Host Name: [insert subdomain here, i.e. 'www']
Value: proxy.webflow.com
Record Type: CNAME
TTL: 300
NOTE: DNS settings are updated through your DNS Provider's Control Panel and can take up to 48 hours to take effect. If your DNS provider is unhelpful or unresponsive, contact us and we can try to get a hold of them on your behalf.
SSL Hosting: If you are using SSL hosting, you must enter different DNS records. See How to enable SSL Hosting
Step 3b: Purchase a new custom domain
If you do not already have a custom domain, you can purchase one directly from this tab using Google Domains (US billing addresses only).
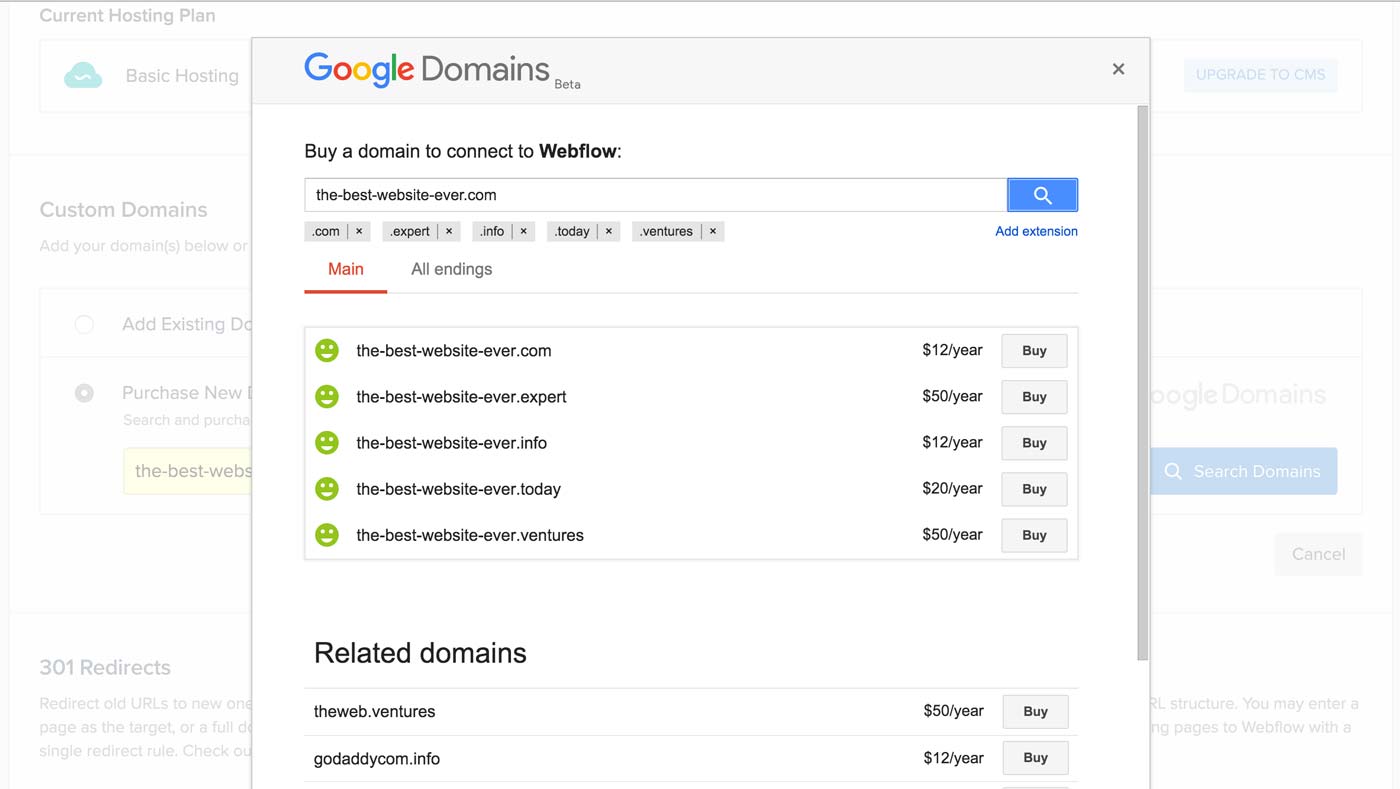
1. Search for a new domain
To get started, simply search for a new domain in the text field.
2. Purchase new domain
If the domain is available, Google Domains will allow you to purchase it using your Google Account.
Note: You may need to add billing information if you have never used Google Checkout before. This is not connected to Webflow's billing system.
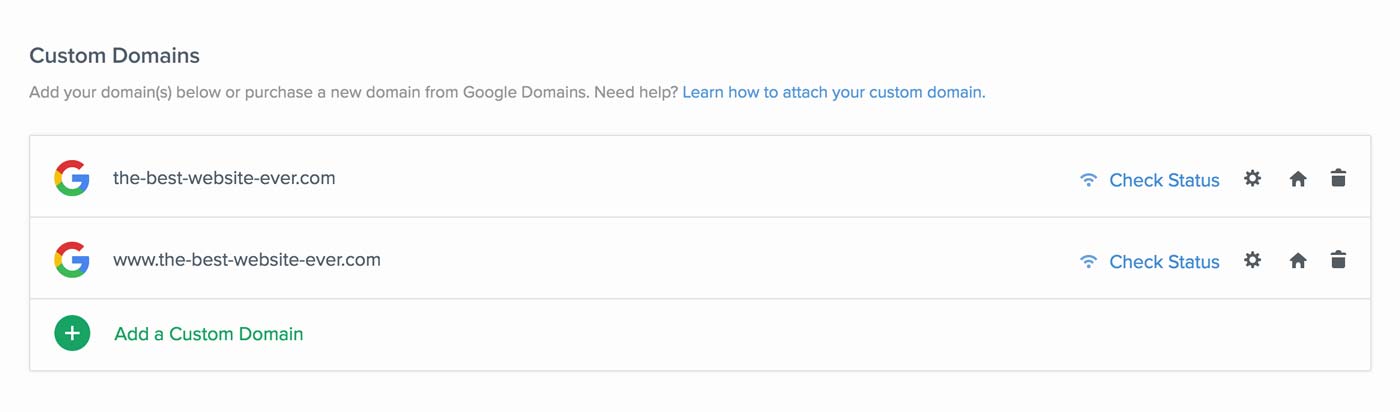
Once you've bought your domain, you'll be brought back to your Webflow site settings, and see that the domain(s) has been added.
Step 4: Set a default domain
Setting a default domain will forward all traffic to the domain you choose. For example, if you added www.mywebsite.com and mywebsite.com, and select mywebsite.com as your default domain, all traffic for your homepage will be directed there.
Step 5: Publish your website
The final step is to simply publish your website, which will now have the option to select the custom domain you just added!
Oops! Something went wrong while submitting the form
Oops! Something went wrong while submitting the form
No related videos.


No items found.
