

Forms are used to collect data and contain Form Elements like Input Fields, Text Areas, Select Menus, and more.
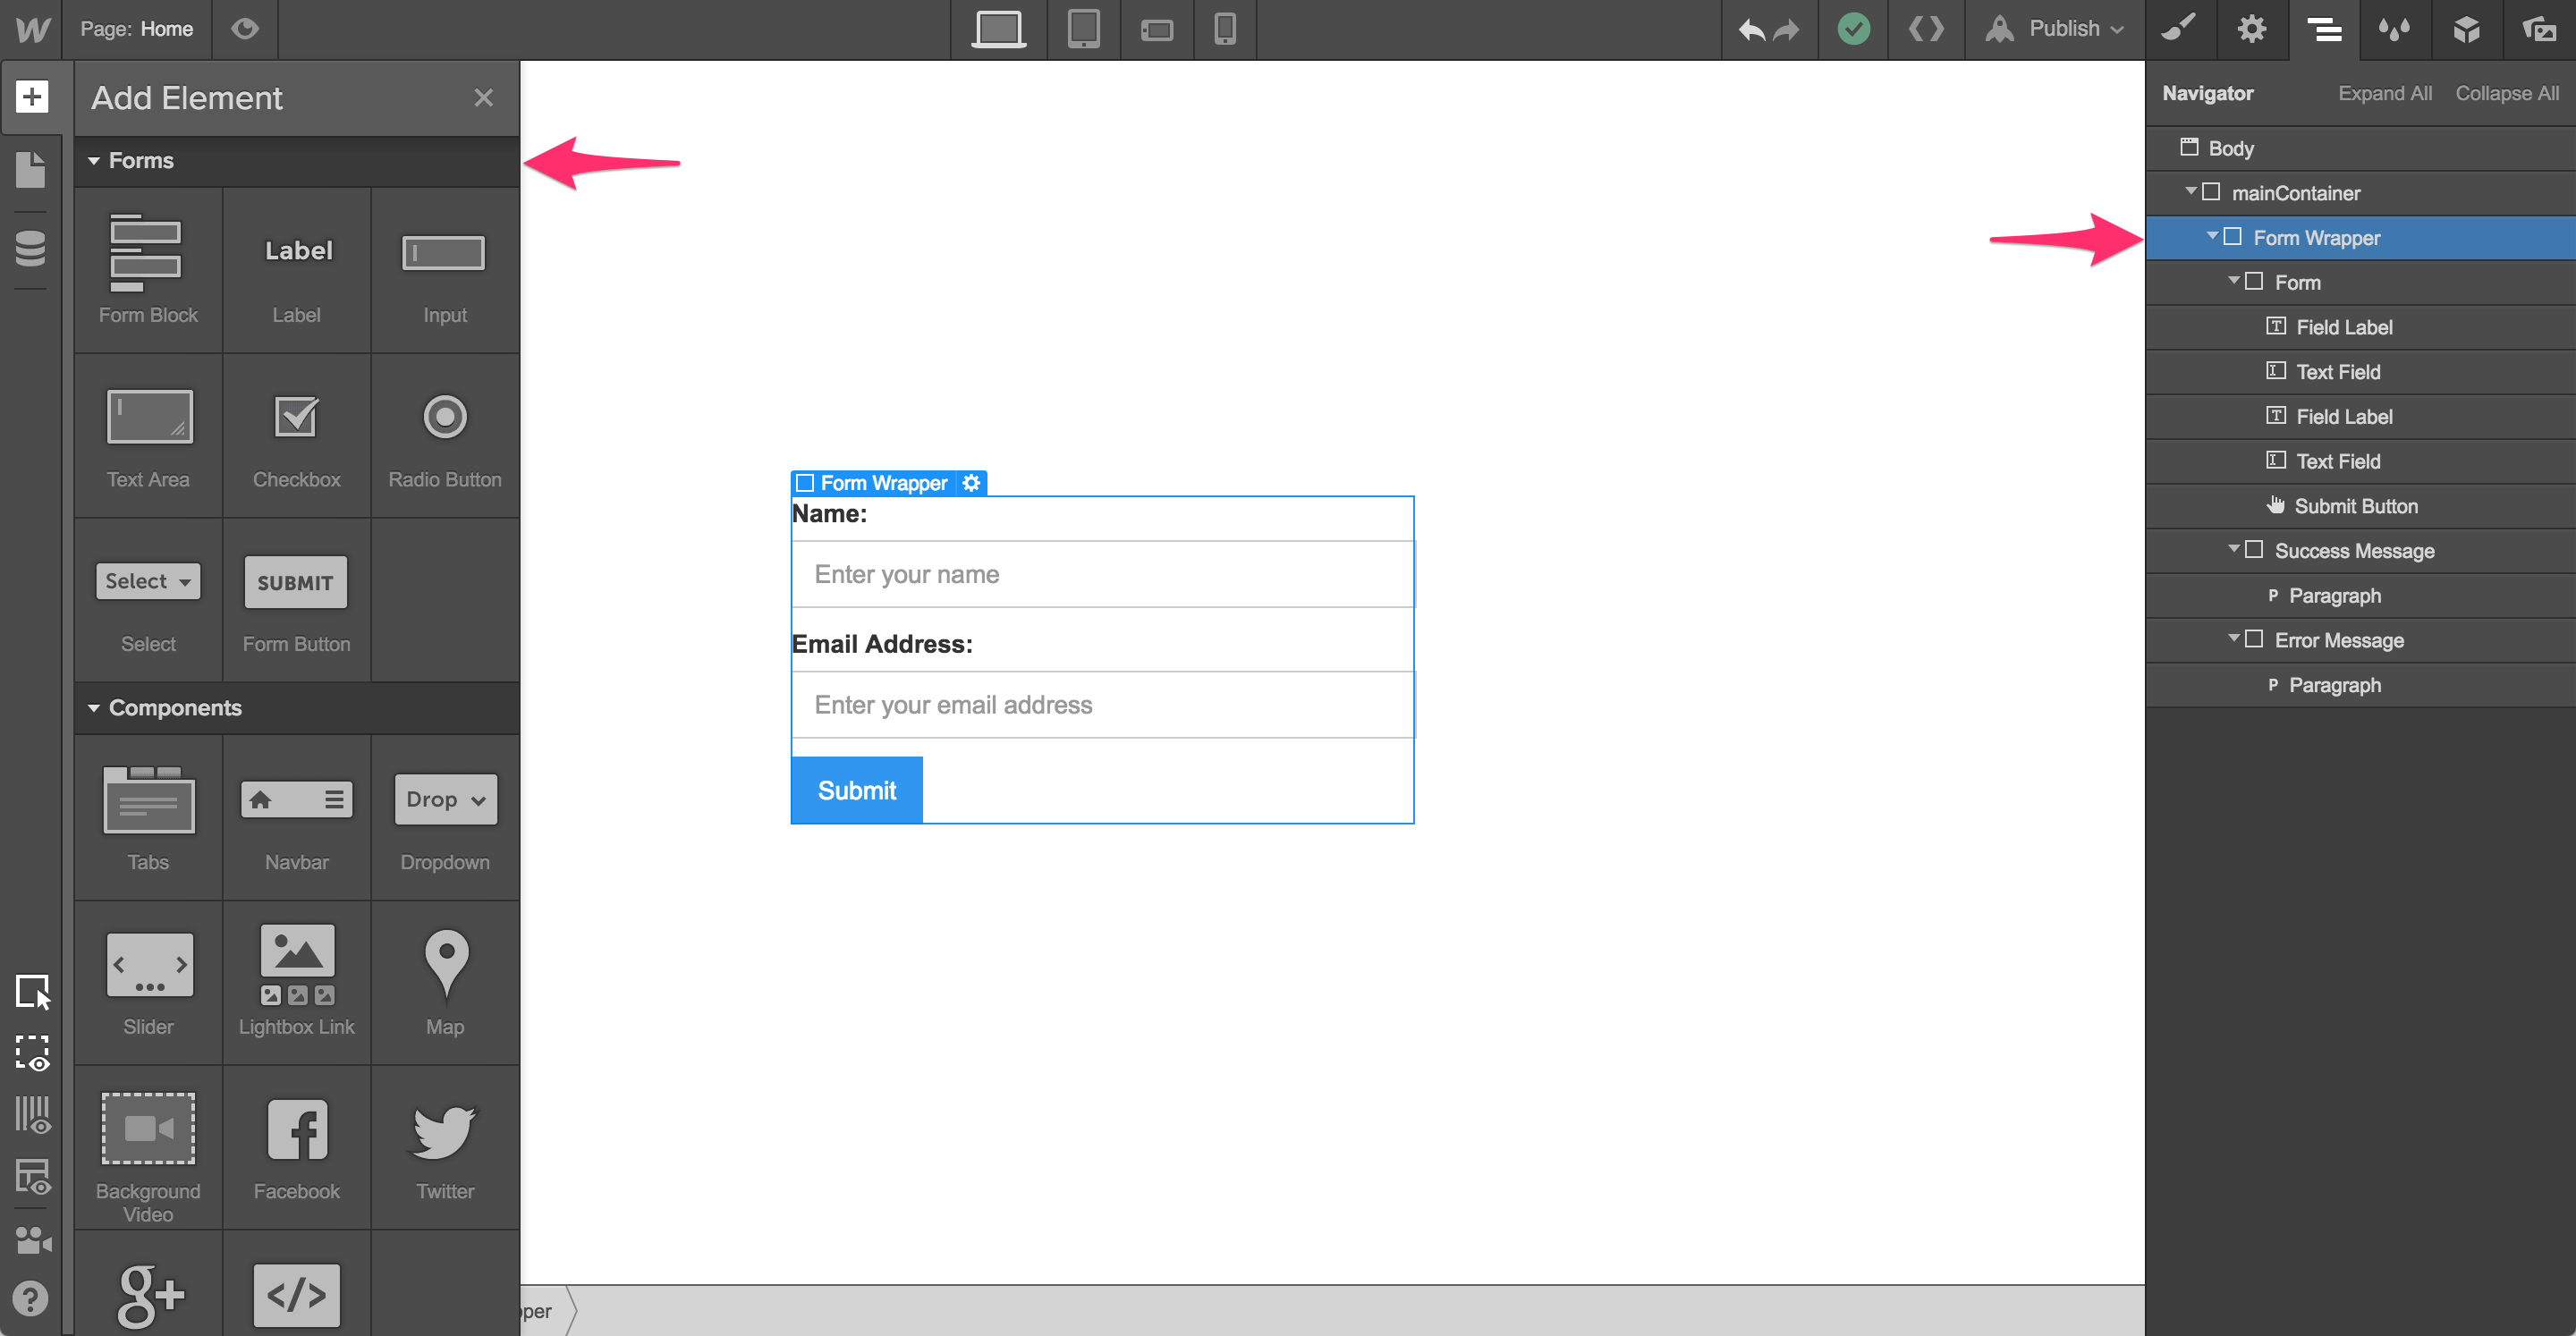
Form Elements
A form is made up of multiple elements that all come together for a great way to collect information from your website visitors.
Form Block
The form block is the element wrapper that holds all of the form elements inside of it.
Label
A label is almost like a normal text field, but is used alongside the form fields as labels for when you either export (CSV) or receive an email notification.
Input
The input field is the core form field used to collect single-line data (like a one word response to a question). Like any of the elements within forms, you can further customize it by giving it a class and adding style attributes within the style panel.
Text Area
Unlike the normal input field, the text area field allows visitors to input multi-line data (like comments or long, multi-line answer to a question).
Checkbox
The checkbox field is best used for input data where the visitor can select one, none or multiple options.
Select Menu
This field behaves very similar to a dropdown field, where you can add a list of different options for your visitor to select from. You can also allow for multiple selections.
Form Button
No form is complete without the form button. This special button is what triggers the action of the form to complete.
Form Settings
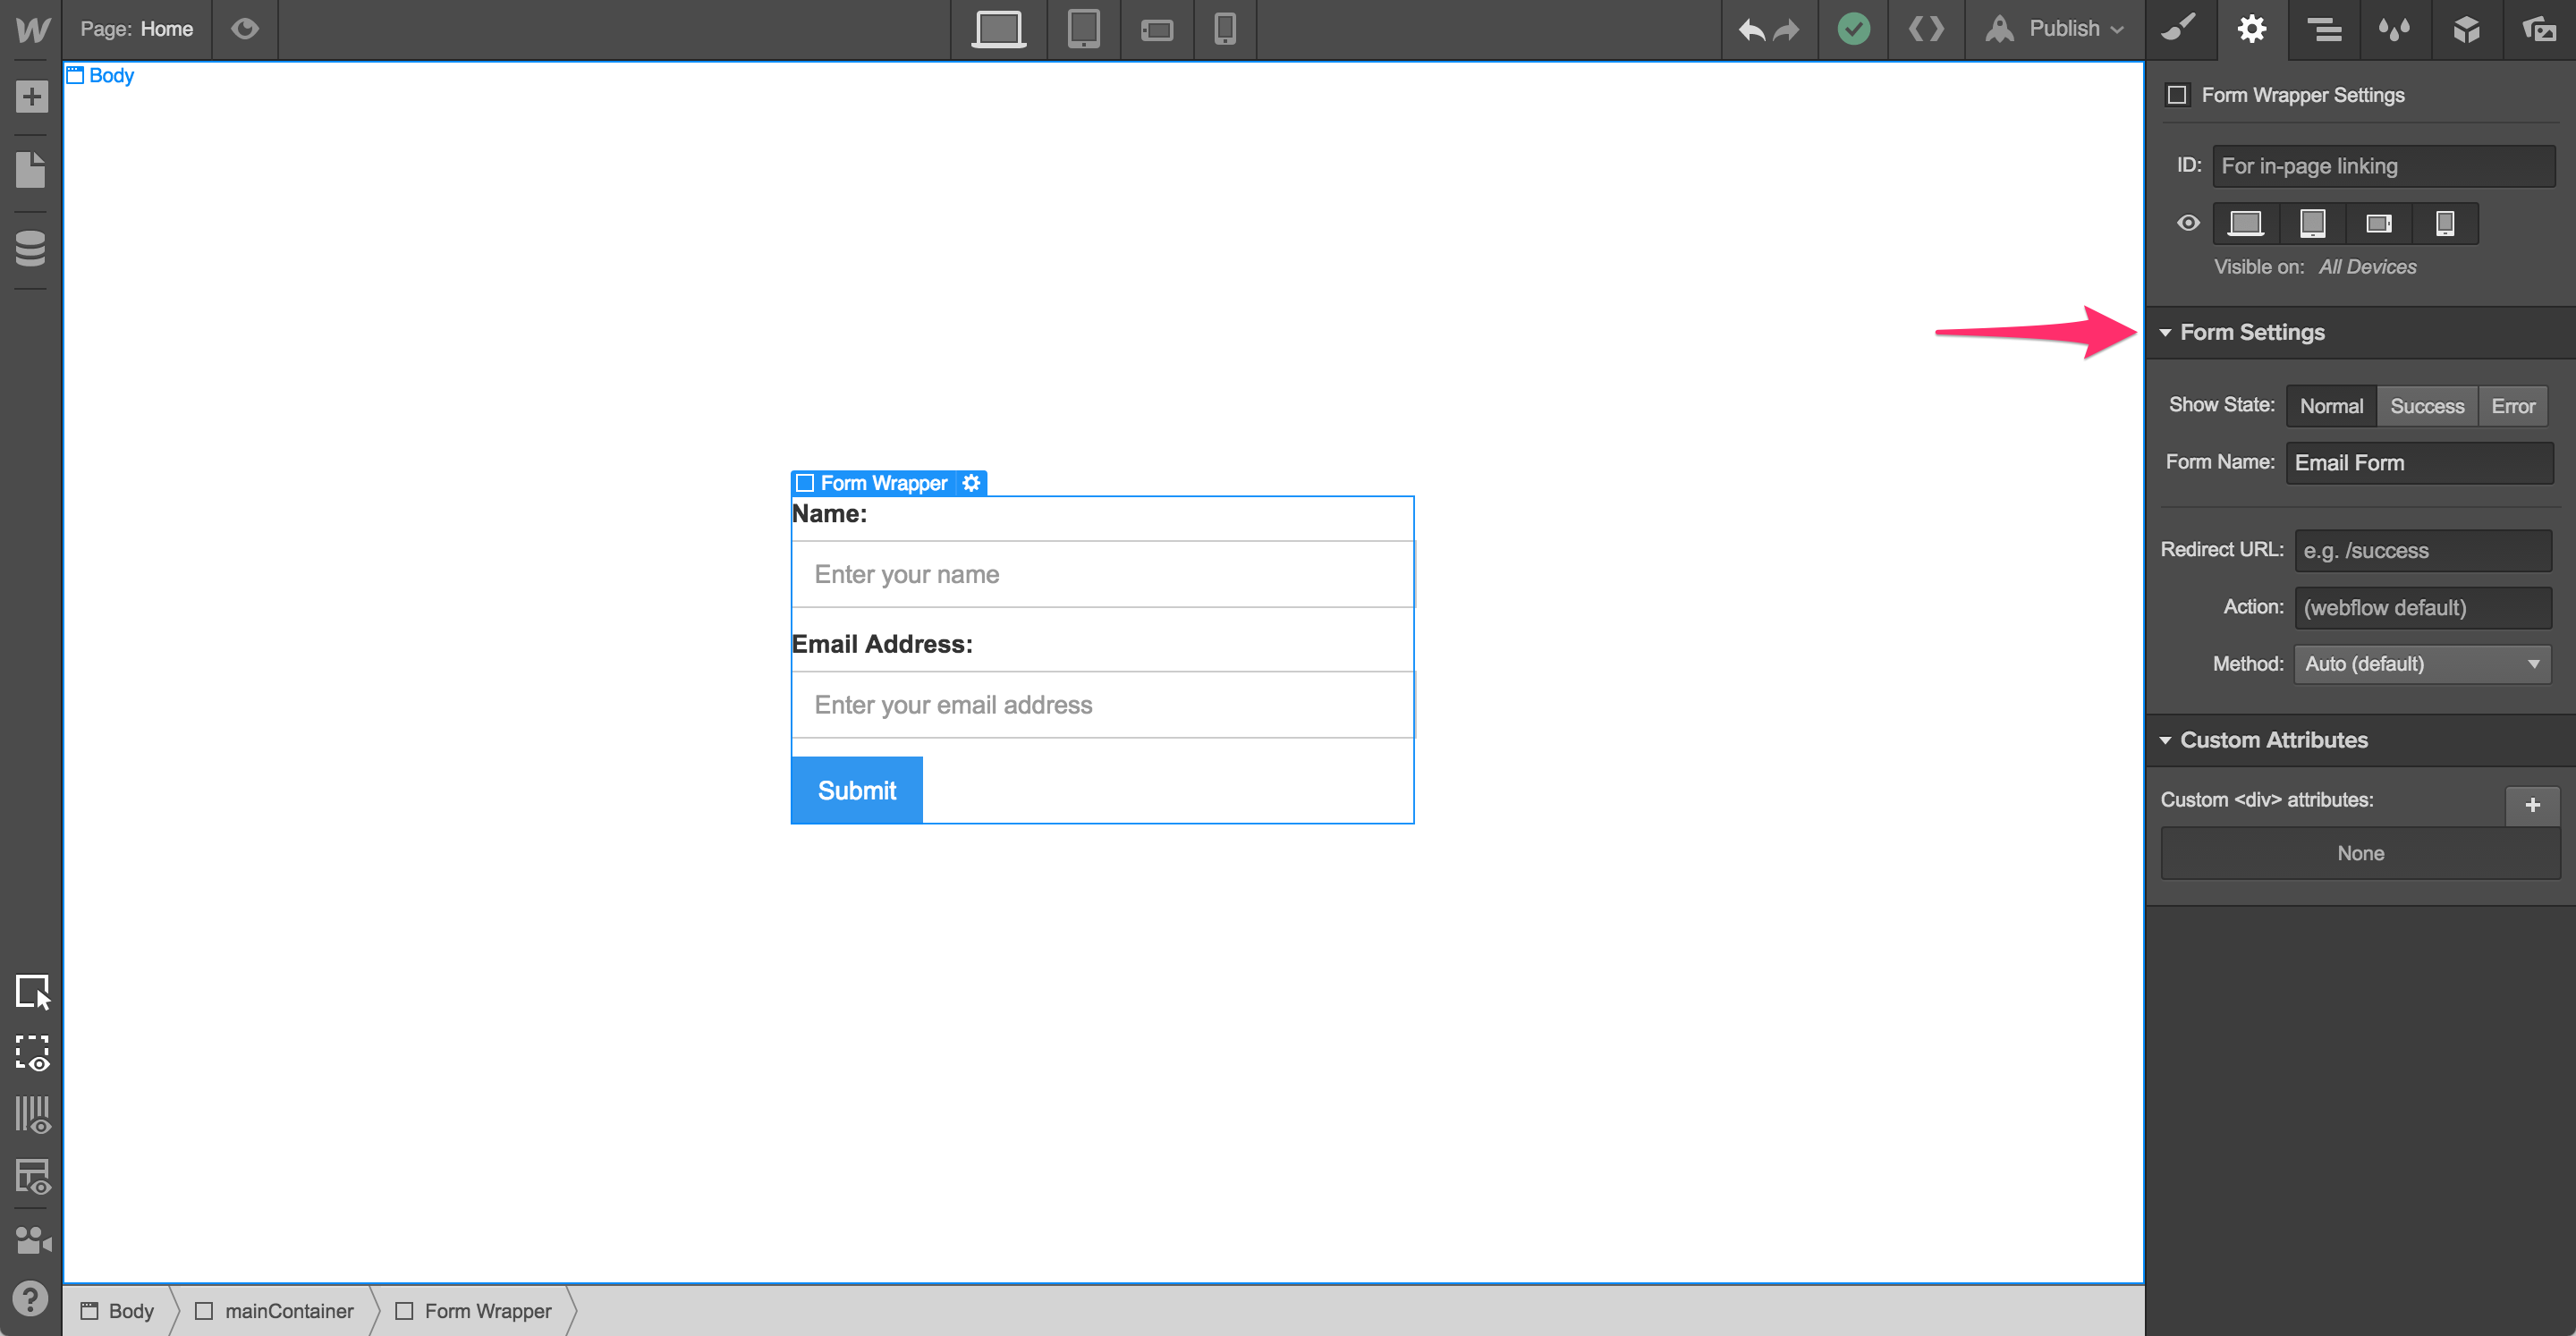
If you want to further customize your form, including designing your Success and Error states, access your Form Settings in the settings panel.
Show States
The show states represent the different views that visitors will see for your form depending on how they interact with the form. These states include Normal, Success and Error.
Normal State
The Normal state is the default view of your form, and is the state that your visitors will see when they are on your site. This is where you will customize, edit and add your form elements.
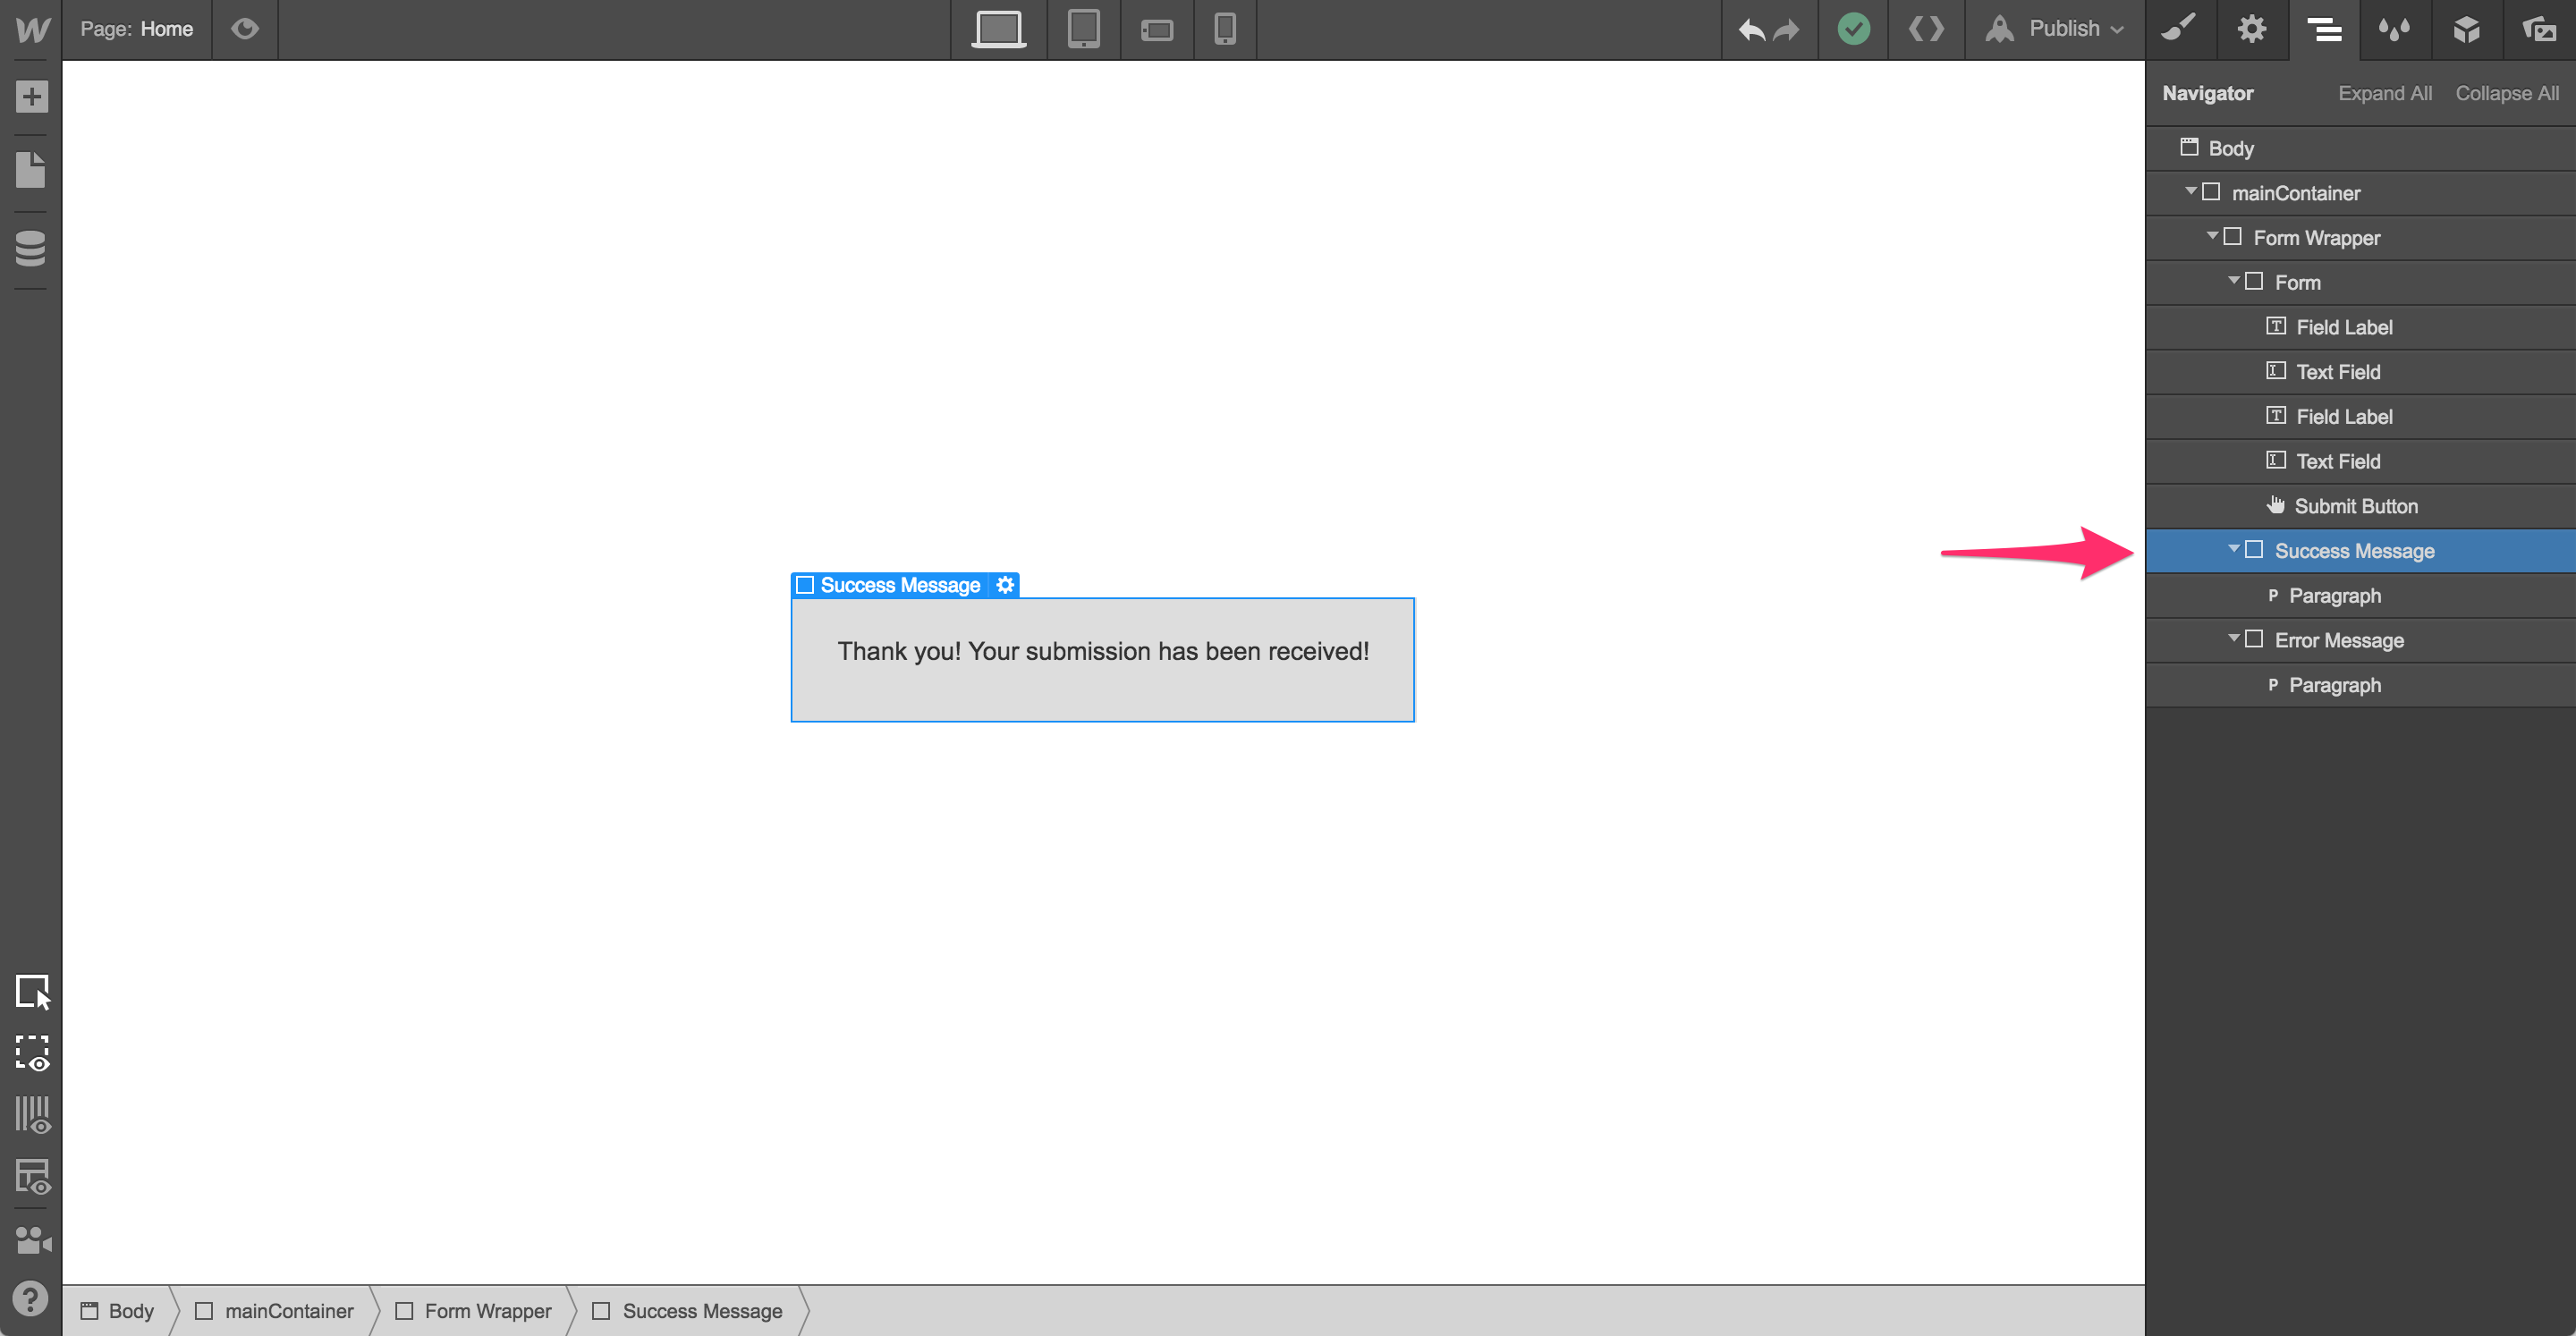
Success State
This is the state that will appear when a visitor successfully fills out the form. You can customize both the styles and content that appear here, including a secret message, a link to a download, or reminder to check their inbox.
Error State
If a visitor fails to properly fill out the form, which happens if/when there are required fields missing or incorrect information (an invalid email address, for example). Just like the Success state, you can customize how this message will appear.
Form Name
The name of your form is how you will differentiate your forms (if you have multiple) from one another when receiving email notifications or exporting your form data. A common step here might be to name your form depending on which page it is on (i.e. Contact Form vs Home Form). Giving your form a name allows you to know which form was submitted and gives you better insight to your where your visitors are interacting with your site.
Redirect URL
Similar to the Success state, this field allows you to redirect your visitors to a different URL upon a successful completion of the form. A common use case would be to forward your visitor to a Success Page where they can display a unique message or include priority content.
Action and Method
Action and method or advanced form features that allow you to customize how and where your form is submitted.
Action
The form action is the direction for where (or how) you want your form to be submitted for data processing. This is the field you would edit if you were looking to direct form submissions to Mailchimp, for example.
Method
This field allows you to specify whether to send form data as URL Variables (get) or as HTTP Post Transactions (post). This is an advanced option.
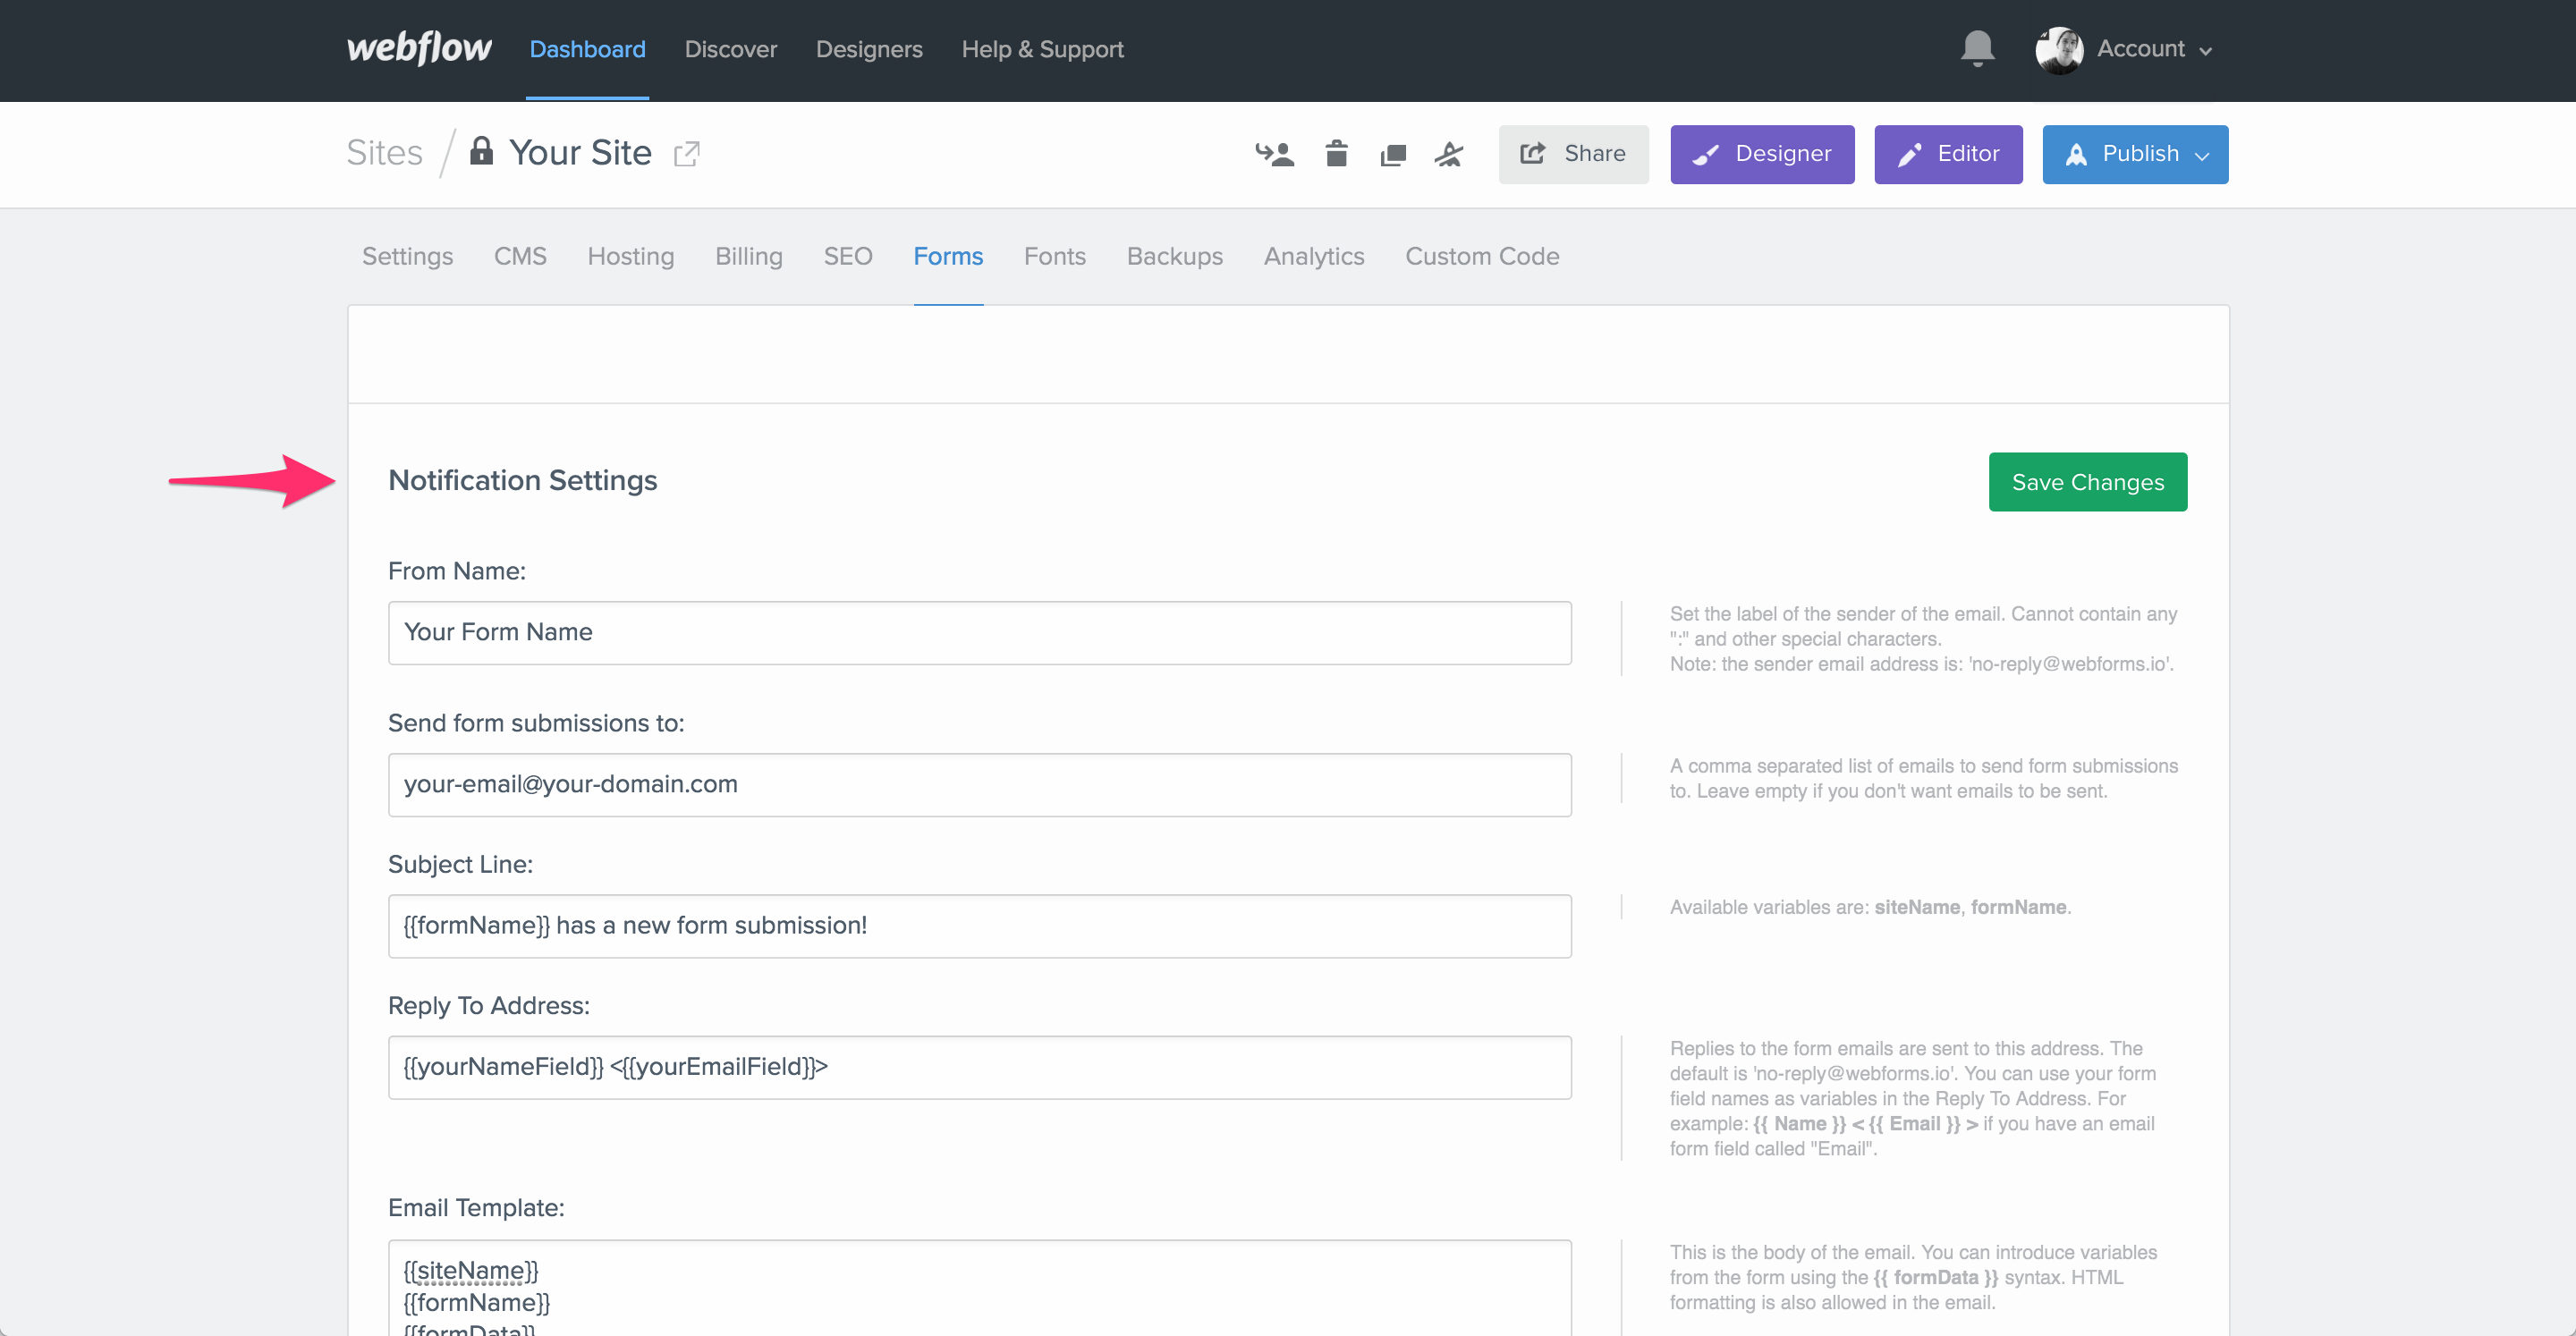
Form Notifications and Data
Managing forms, as well as viewing and exporting form submissions can be done from the Forms tab within your website settings. It is also here where you manage how and where you wish to receive your form notifications.
Notification Settings
When a visitor submits a form, a notification will be triggered to notify you (or the website owner) of the submission and the data that was sent. You can manage how and where you can receive this data by changing the information below.
Form Variables
Form variables allow you to dynamically customize the text that populates the notification fields, and include:
- {{siteName}}
- {{formName}}
- {{formData}} (A list of all of the form fields in the submission)
- {{formDashboardUrl}}
From Name
This is the name that will appear as to where your receive this form (email) from. A common (and recommended) solution would be to put in the name of your site where the form lives. The reason here is that if you have multiple Webflow sites, you want to know which site the form was submitted from. You could also use a unique form name that is specific to this particular site.
Sender Email Address
This is simple a comma separated list of emails to send form submissions to, meaning that each email you insert here will receive a notification every time a form is submitted on this site. Leave this field empty if you don't want email notifications to be sent at all.
Subject Line
This is the displayed subject of the notification email that you receive. You can use form variables like {{siteName}} and {{formName}} to best differentiate your notifications.
Reply to Address
This is the email address that receives replies when responding to a form notification email. You can reply to captured emails using {{yourEmailFieldName}}
Email Template
The Email template is how your form data is displayed in the email notification body. Variables such as {{siteName}}, {{formName}}, {{formData}} and {{formDashboardUrl}} are common entries to be displayed here.
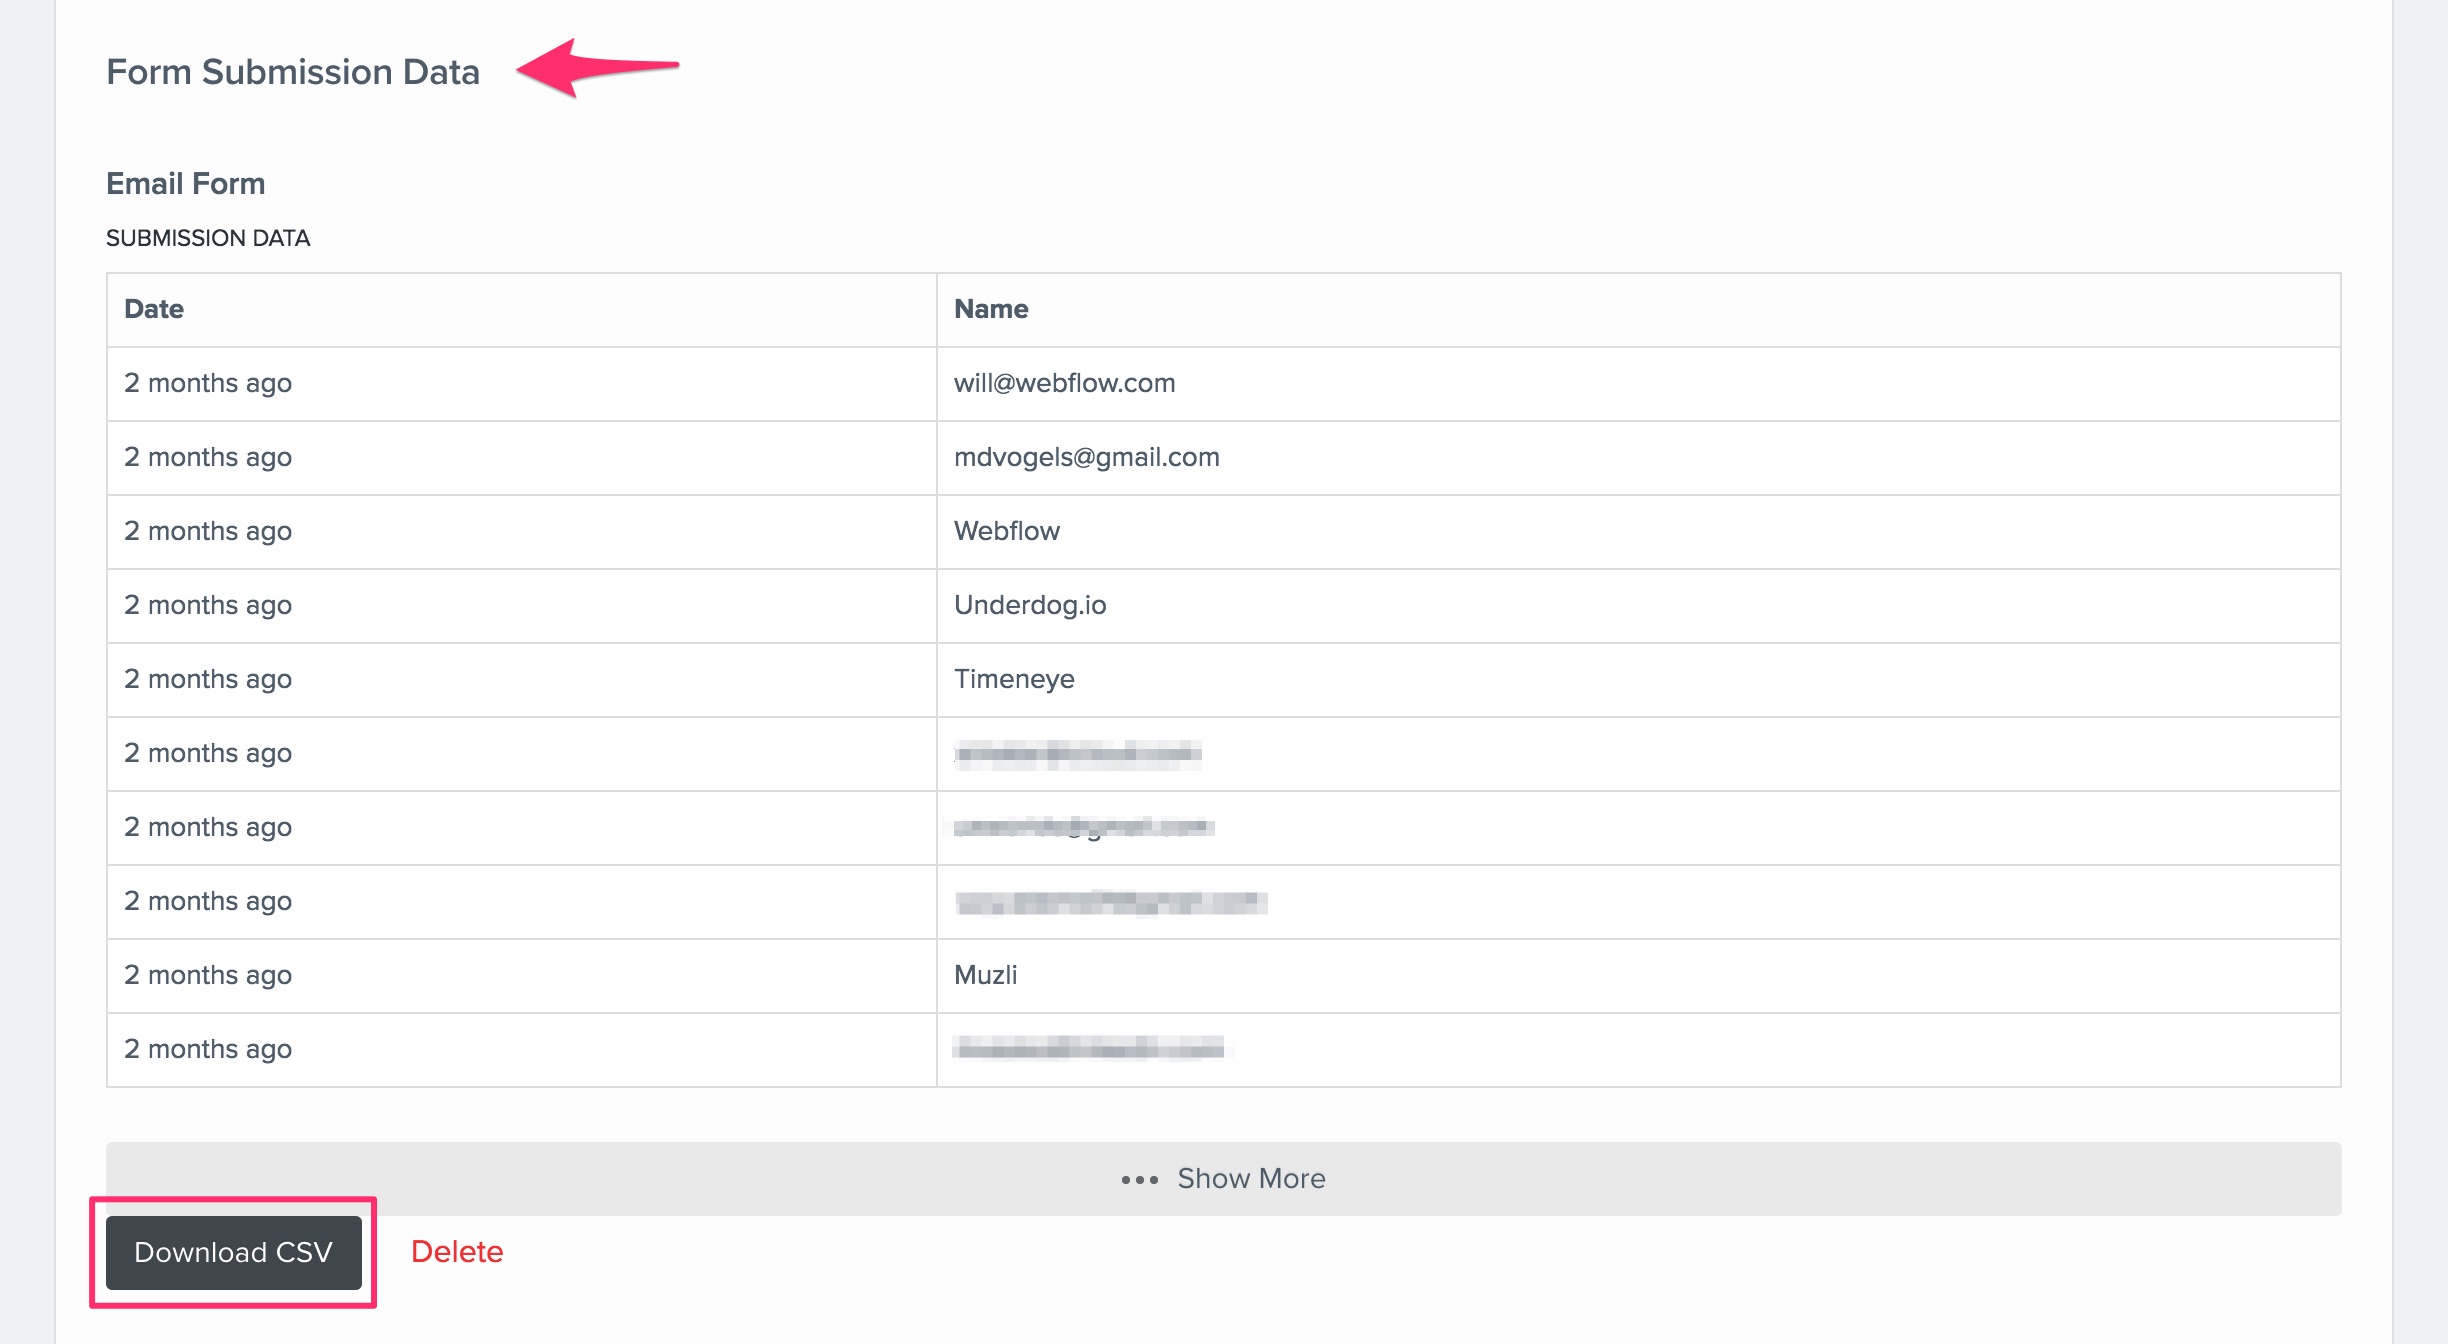
Form Data
You form data is collected and stored on your Forms tab within your site settings. Here you can see a bird's eye view of all your forms, and most recent submissions. This is also where you can export your form data as a CSV file to be used however you like!
Oops! Something went wrong while submitting the form
Oops! Something went wrong while submitting the form


A set of elements that make up a basic form.
A form element that lets website visitors submit data to your form handler.
When someone sends data through one of your site's forms.
The amount of times a site visitor submits data using your site's form(s).
A section of the Add panel that houses form elements like inputs, checkboxes, and radio buttons.
