What are tabs?
Webflow’s tabs component lets you quickly add responsive tabs to your website and style them however you’d like.

How tabs are structured
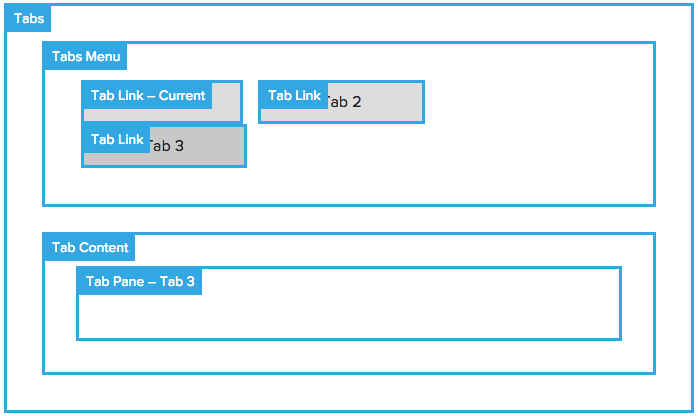
Tabs are made up of several elements, including:

Tab menu: The menu contains all the tab links people use to switch between the tab panes.
Tab links: Each tab link opens its corresponding pane. The tab link labeled “current” is the one that's open on page load.
Tab content: This wrapper holds all the tab tab panes.
Tab pane: The pane holds the tab’s content.
How to add tabs to your site
STEP 1: Open the Add panel
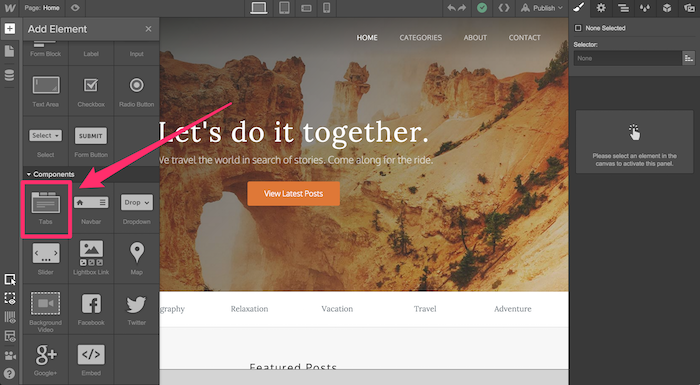
In the Webflow Designer, open the Add panel and scroll to the Components area. Then, just drag and drop the Tabs where you want them.
STEP 2: Add or subtract tabs
The Tabs component features three tab panes by default, but you can add panes by clicking the + icon in the Tabs Settings, or subtract them by clicking the trashcan icon to the right of each tab.

STEP 3: Style your tabs
Now you can start styling your tabs by adding a class to the tab link elements.
You can style both the current (the active tab) and the non-current tabs. The styles you give to the current tab will apply to whatever tab is currently displaying its content.

STEP 4: Add your content
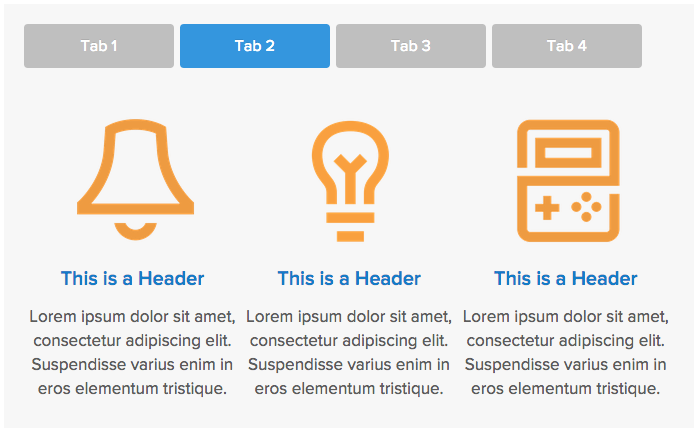
Now you can add your content, whether it’s images, text, or even video. Check out the variety of content we added to the example below.

STEP 5: Adjust the easing method
Now you can adjust the easing method (the way the tabs transition from one to another) and the fade in and fade out times to get your tabs just right.
You’ll find these options on the top right of the Tabs’ Settings Panel.
STEP 6: Check and adjust the mobile device views if needed
Before you finish up, check the mobile device previews to ensure your Tabs will look and work great on any device.
Oops! Something went wrong while submitting the form
Oops! Something went wrong while submitting the form
No related articles.
No items found.


