Filtering content
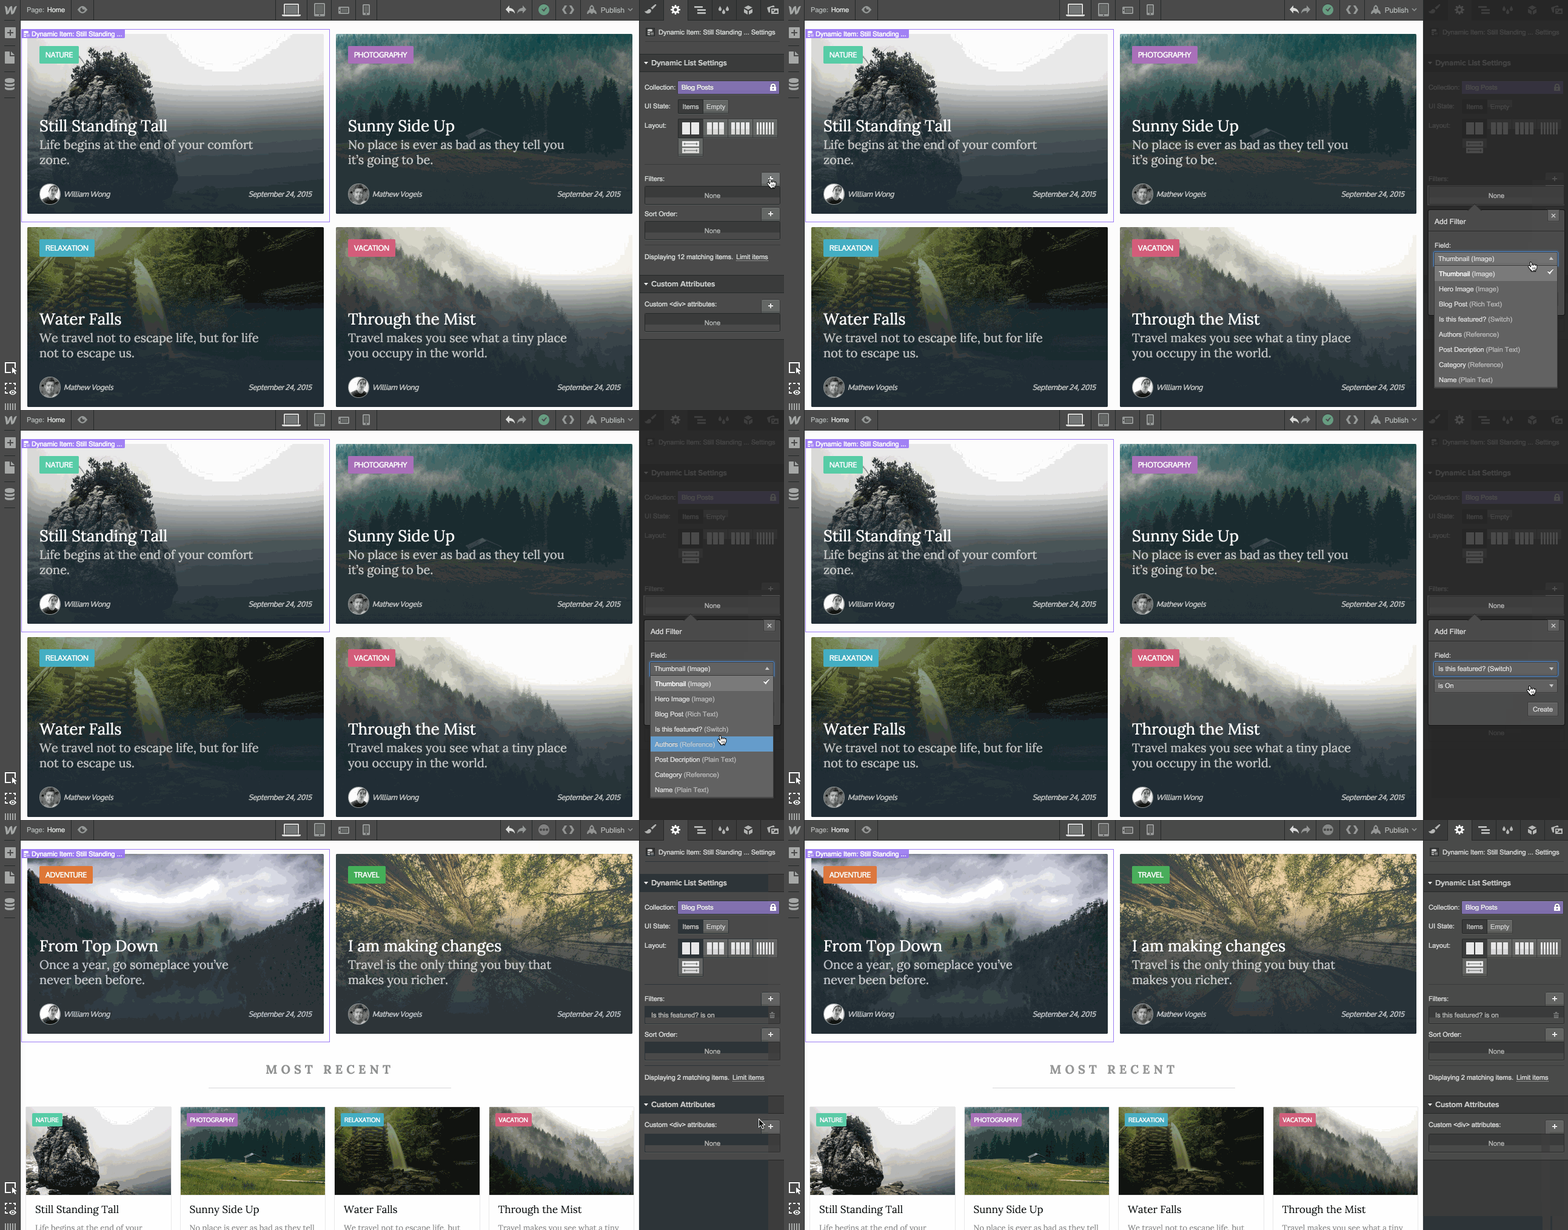
Filtering your dynamic lists allows you to show only the collection items that you want. You do this by simply selecting the list, then navigate to the Settings Panel.
Here you will see a section labeled 'Filters'. To add a new filter, click on the "+" button.
Here you will be given a dropdown list containing the fields that you've added to the collection. It is with these fields that you can filter and reference specific collection items.
In our example, we select to only show items in which our Switch Field is On.

Sorting content
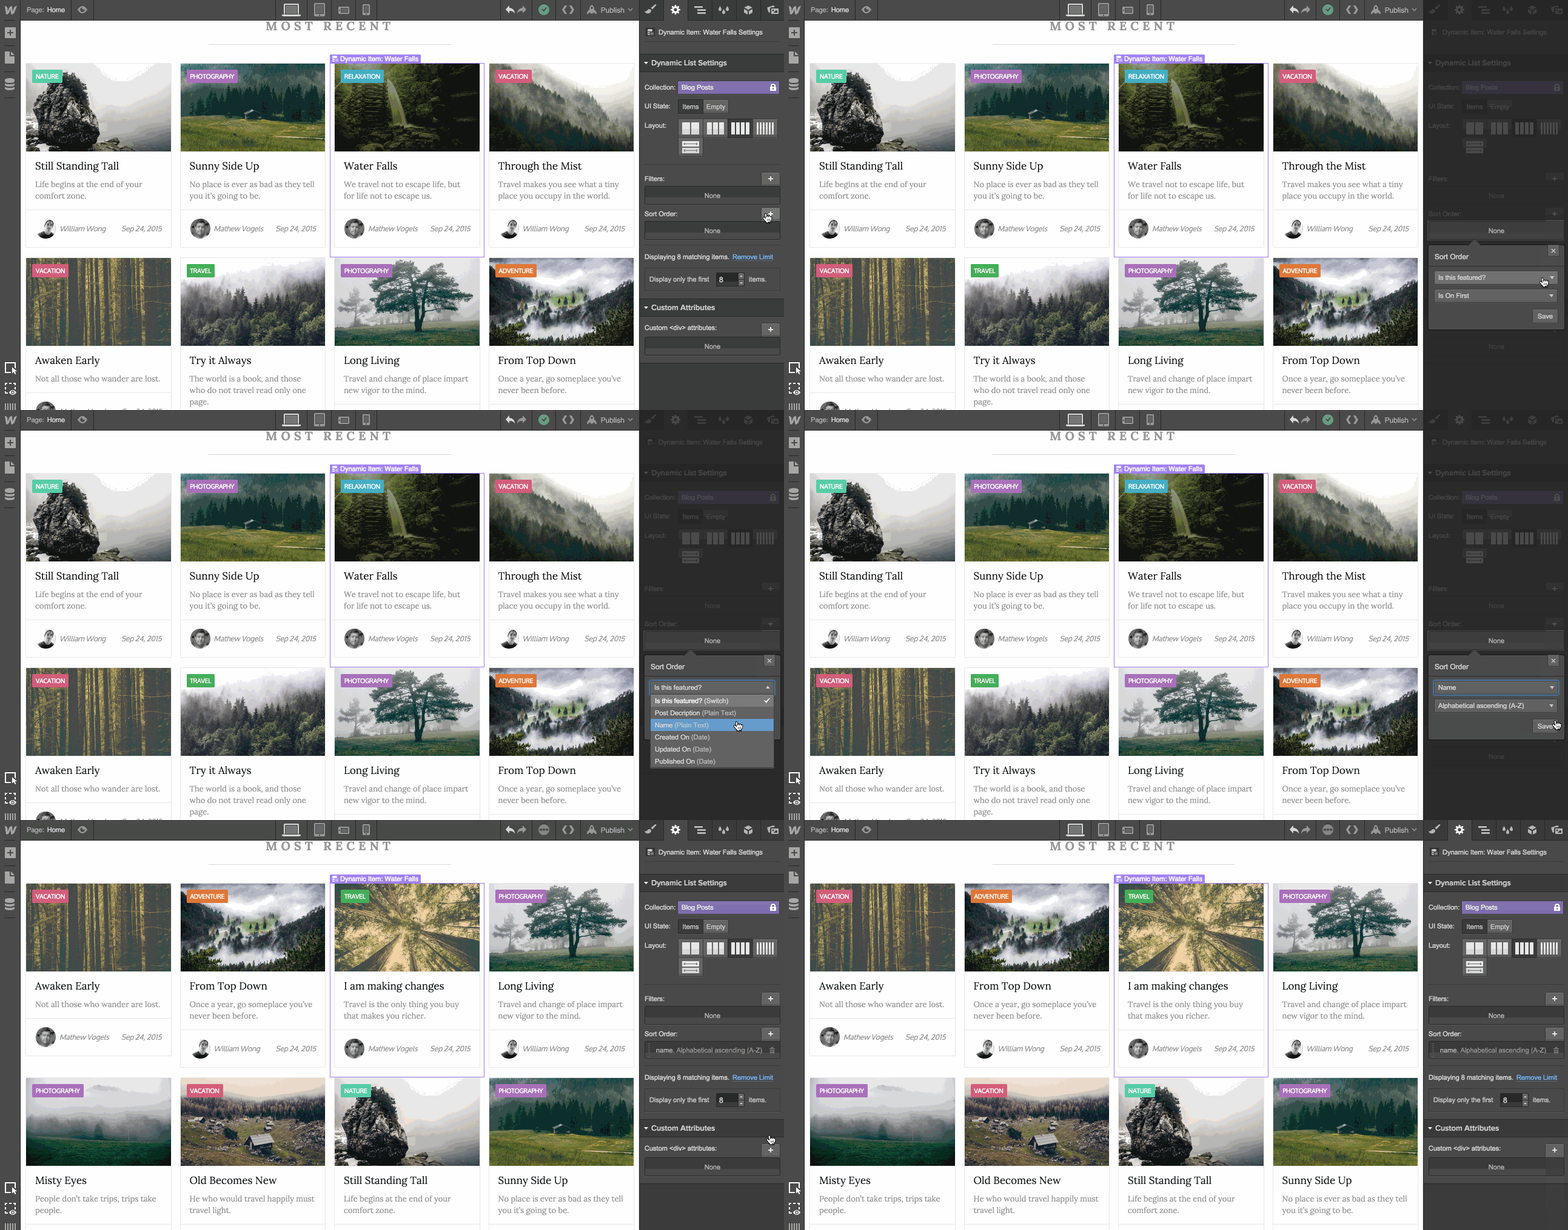
In some cases you want to sort your content in a specific way. Common examples might be to sort alphabetically, or perhaps from the date to which the items were created on the site.
The sorting panel is located right below the Filters panel, and will allow you to sort using a variety of fields from your collection, as well as defaulted dates that Webflow will create automatically, including the Published Date, Created Date and Modified Date.

Limits
Adding a limit to your dynamic list allows you to show only a certain number of items. By default Webflow will show all items that exist within the collection, so in many cases it might be handy to limit the number that are displayed.
Limit ranges: "Start at" and "Limit to" options
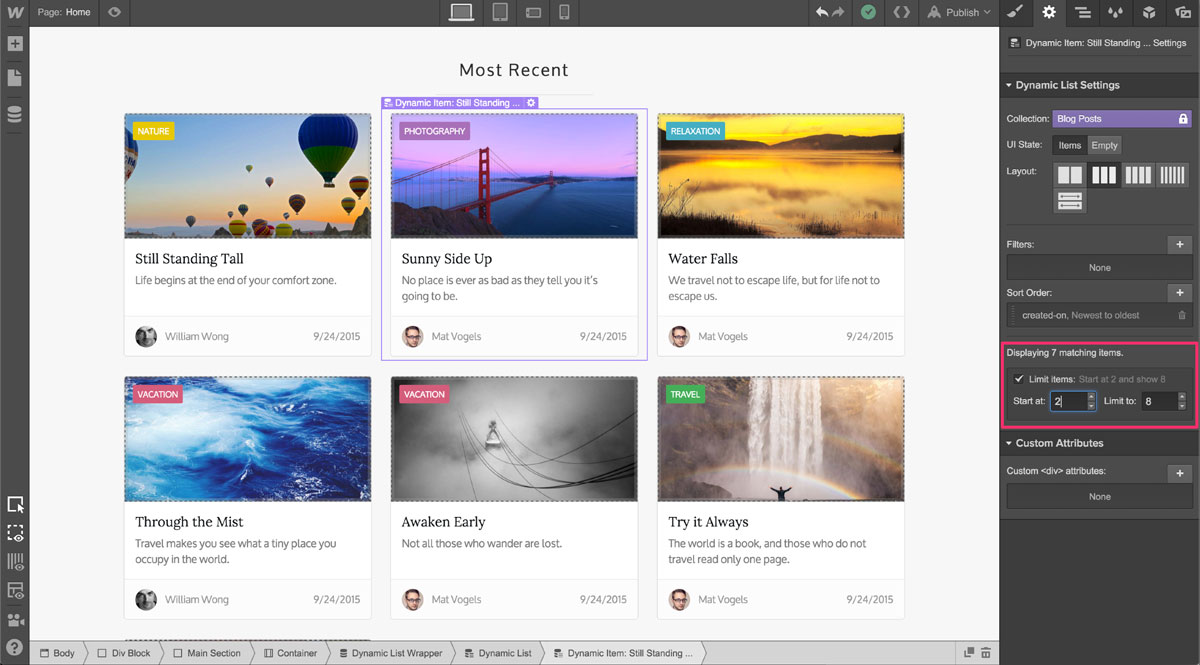
You can also create a range you want to limit items to. Instead of simply limiting the max number of items, you can choose to create a limit range between two values. For example, perhaps you want to skip the first item in your dynamic list. You can choose to start at 2, which will skip the first item, and start the list with the second item.

Oops! Something went wrong while submitting the form
Oops! Something went wrong while submitting the form
No related articles.
No items found.


