
In Webflow, you’ll create dynamic content using two things: Collections and Fields. Collections are groups of data with Fields you (or your designer) define. Once created, you can display this content however you’d like.
In this article, we’ll break down the different fields you'll use in creating Collections, and walk you through the process of adding Fields to a Blog Posts Collection.
Step 1: Create a new Collection
First, open the Collections panel on the left side and click the New Collection button on the top right.

Starting with a Collection Template
Instead of naming your Collection, and then adding Fields, you can start with one of our Collection Templates, which will automatically populate all of the fields needed.

These templates include Fields and field labels that we recommend for common Collection types, but, you can customize them however you'd like.
Every Collection starts with two required fields
1. Collection Name
The Collection's name will be used throughout your site, so be sure to pick one that’s easy to recognize and remember. Examples include Blog Posts, Events, Team Members, or Job Listings.
Note that Webflow creates both singular and plural versions of the name: one to label the Collection (plural), and the second to label individual items in the Collection (singular). So if you create a Collection called "Blog Posts," an individual item in that collection would be labelled a "Blog Post."
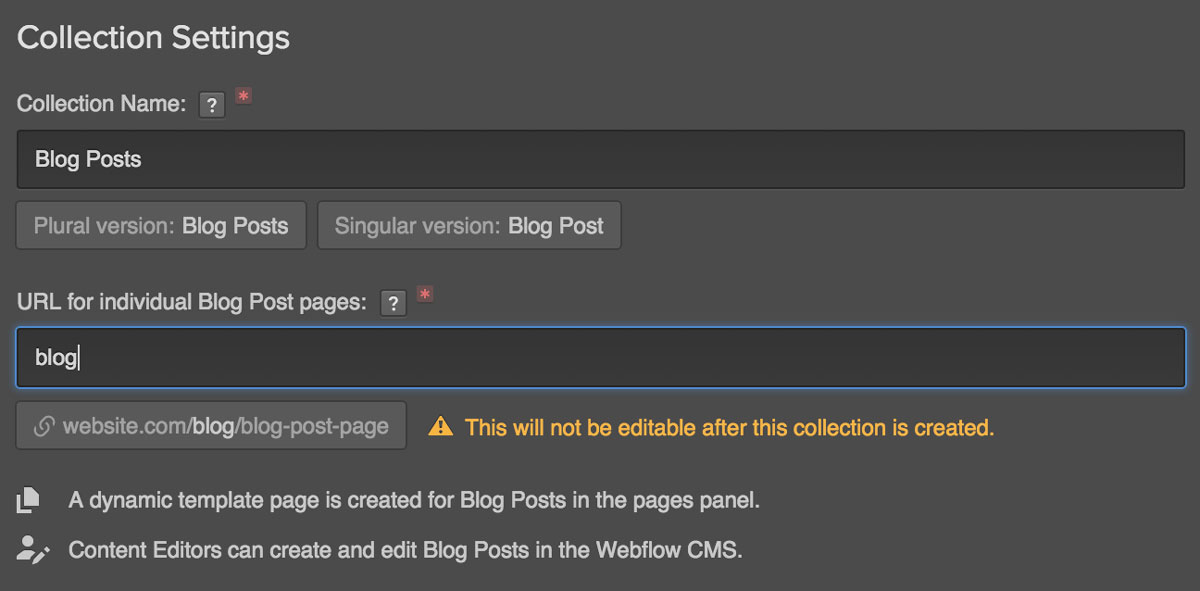
2. Collection URL/Slug:
The Collection URL is the text that will display as the parent to your individual item URLs. The URL will match the name of the collection by default, but you can change it to whatever makes sense for the Collection Items.
So for your Blog Posts collection, the URL/slug might be: www.website.com/blog/blog-posts-page.
Step 2: Add Fields to your Collection
Your Collection’s Fields define the various elements that make up your content.
You can add, delete, and modify Fields anytime, even after you’ve published items in a Collection. Be sure to understand how any changes might affect existing items - for example, deleting a field will delete the content from all of the items that currently use this field.

And to make things easier for your Content Editors, you can customize your Fields to define:
Help Text
You can use Help Text to explain what content should go in a given field. This will only appear in the CMS, not on the public site.
Minimum and Maximum Length
You can define the minimum and maximum number of characters (with spaces) for any text Field. This will prevent long headlines or labels from breaking your design.
Required Field
You can set any Field as "Required," forcing content editors to enter some value before they can publish the item.
Learn more about the different Collection Fields here.
Oops! Something went wrong while submitting the form
Oops! Something went wrong while submitting the form


No items found.
